The holiday season is the busiest and most profitable time of year for crafters, print shops, and boutique owners. If you are looking for a way to create high-end, vibrant, and incredibly durable custom holiday decorations without dealing with the weeding headaches of traditional vinyl, UV DTF (Ultraviolet Direct-to-Film) transfers are your answer.
Unlike traditional methods that require heat presses or tedious vinyl weeding, UV DTF transfers use ultraviolet-cured inks and a strong built-in adhesive to apply full-color, 3D-textured designs directly onto hard surfaces. They look identical to direct UV prints but can be applied by hand in seconds.
Applying these transfers to tricky, small surfaces like Christmas ornaments requires a bit of technique to ensure zero bubbles and clean edges. This comprehensive guide walks you through the entire process, covering the exact tools you need, advanced troubleshooting strategies, and professional tips to scale your holiday inventory.
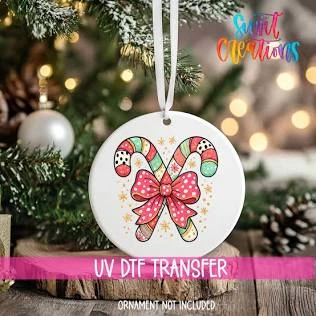
What is a UV DTF Transfer?
Before diving into the application process, it helps to understand what makes this technology unique. UV DTF transfers consist of cured UV ink topped with a high-gloss protective varnish layer, backed by an aggressive, pressure-sensitive adhesive.
The transfer sheet is composed of two main layers:
- The Transfer Film (Film A): The clear top sheet that carries the printed design.
- The Release Liner (Film B): The bottom backing paper that protects the adhesive layer until you are ready to apply it.
Because they require absolutely no heat to apply, UV DTF wraps open up a world of possibilities for materials that would warp, melt, or crack under a traditional heat press.
Why Use UV DTF for Christmas Ornaments?
If you have spent years working with permanent adhesive vinyl or Sublimation, you might wonder if switching to UV DTF is worth it.
UV DTF vs. Traditional Personalization Methods
| Feature | UV DTF Transfers | Permanent Vinyl | Sublimation |
| Heat Required | None (Pressure Only) | None | High Heat ($350^{\circ}\text{F}$ to $400^{\circ}\text{F}$) |
| Color Depth | Unlimited colors + White ink | Limited by roll colors | Unlimited (Requires special coatings) |
| Texture | Raised, 3D glossy finish | Flat or slightly layered | Fully flat (Embedded in coating) |
| Weeding Time | Zero weeding required | High weeding time | Zero weeding required |
| Material Flexibility | Glass, Acrylic, Wood, Ceramic | Glass, Acrylic, Wood, Ceramic | Polyester or polymer-coated blanks only |
For holiday production lines, the zero weeding aspect alone can cut your production time by up to 70%. Furthermore, the addition of opaque white ink backing allows UV DTF designs to pop beautifully on dark wood or crystal-clear glass blanks where sublimation or standard inkjet transfers would appear translucent.
Essential Supplies You Will Need
To get professional, retail-quality results, gather your tools before starting. Having the right tools on hand prevents alignment mistakes and ruined transfers.
- UV DTF Transfer Sheets: Pre-printed holiday patterns, names, or custom logos.
- Ornament Blanks: Flat acrylic round discs, ceramic circles, flat glass ornaments, or sanded wooden slices work best.
- Isopropyl Alcohol (70% or higher): Critical for removing oils and fingerprints from the substrate.
- Microfiber Cloth: For a lint-free wipe down.
- Felt-Tipped Squeegee: A standard plastic scraper works, but a felt edge prevents scratching the clear transfer film.
- Scissors or a Precision Craft Knife: For trimming your designs tightly.
- Painter’s Tape: Useful for checking alignment before final application.
Step-by-Step Application Guide
Applying a transfer to a completely flat ornament is relatively straightforward, but the aggressive adhesive of UV DTF means you only get one chance to position it correctly. Once the adhesive touches the substrate, it cannot be repositioned without destroying the design.
Follow this exact workflow to guarantee a perfect bond every single time.
1.Prepare the Ornament Substrate:Time: 1 min。
Wash your hands thoroughly to remove skin oils. Spray your ornament blank with isopropyl alcohol and wipe it clean with a microfiber cloth. Any invisible grease, dust, or fingerprints left behind will prevent the UV DTF adhesive from bonding permanently, causing the edges to lift later.
2.Trim the Design:Time: 2 min。
Using sharp scissors, cut out your specific design from the larger UV DTF sheet. Trim as close to the edges of the artwork as possible. Trimming the excess clear transfer tape makes it significantly easier to align the design on a small, round ornament and reduces the risk of accidental creasing.
3.Separate the Film and Liner:Time: 1 min。
Rub the front and back of the trimmed transfer with your squeegee to ensure the design is fully adhered to the clear transfer film. Then, firmly grab a corner and peel the white backing liner (Film B) away from the clear carrier sheet at a sharp 180-degree angle. Ensure all parts of the design remain stuck to the clear top tape.
4.Align and Place the Transfer:Time: 1 min。
Hold the clear transfer film by its edges. Hover it directly over your ornament blank to check your alignment. Once you are satisfied with the positioning, drop the center of the design onto the center of the ornament first, letting the outer edges fall naturally.
5.Burnish with a Squeegee:Time: 2 min。
Using your felt-tipped squeegee, push outward from the center of the design to the outer edges. Apply firm, even pressure. Work systematically in a starburst pattern to push out any trapped air pockets. Pay special attention to fine text or delicate details near the perimeter.
6.Peel Away the Clear Carrier Tape:Time: 1 min。
Slowly peel the clear carrier tape back from one corner. Keep your hand low, peeling flat against the surface rather than pulling straight up. If any part of the design begins to lift with the tape, stop immediately, lay the tape back down, rub it aggressively with your squeegee, and try peeling from a different angle.
Working on Curved or Spherical Ornaments
While flat ceramic and acrylic blanks are easiest for beginners, you may want to customize traditional glass or plastic globes. Applying a flat sheet of film to a three-dimensional sphere is geometrically challenging and can lead to folding, creasing, and bubbling.
If you are working on a curved spherical ornament, use the Snip Method:
The Snip Method: Before peeling off the white backing liner, take your scissors and make small, strategic relief cuts into the excess clear carrier tape around the design. Be careful not to cut into the actual printed ink. These small slits allow the film to flex, overlap, and contour gracefully around the spherical curve of the bulb without pinching or creasing the main image.
Troubleshooting Common Application Issues
Even experienced crafters encounter issues when adapting to new materials. Here is how to fix the three most common problems encountered during UV DTF ornament printing.
1. Air Bubbles Trapped Under the Film
- Cause: Rushing the application or dropping the entire transfer flat onto the blank all at once.
- Solution: Always apply from the center outward. If a tiny bubble remains after peeling the carrier tape, do not panic. Use a fine sewing needle to prick the very edge of the bubble, then use your finger to gently push the air out through the microscopic hole.
2. The Transfer is Lifting at the Edges
- Cause: Inadequate cleaning, poor burnishing, or trying to peel the carrier tape too fast.
- Solution: Re-wipe your blanks with pure isopropyl alcohol. If the blank has a specialized glossy or hydrophobic coating, rub it lightly with an extra-fine magic eraser before cleaning to give the surface a microscopic texture for the adhesive to grab onto.
3. Clear Film is Exceedingly Hard to Peel
- Cause: Atmospheric humidity or cold room temperatures can occasionally cause the transfer adhesive to cling stubbornly to the carrier sheet.
- Solution: Gently warm the ornament with a hair dryer on a low setting for 5 to 10 seconds before peeling. The gentle warmth softens the adhesive just enough to help it release cleanly from the plastic carrier film while locking onto the ornament substrate.
Best Practices for Google E-E-A-T and Craft Longevity
To ensure your ornaments last for generations, keep these quality and handling parameters in mind:
- Curing Window: Although UV DTF transfers are dry and usable immediately upon application, the underlying adhesive takes roughly 24 to 48 hours to achieve its maximum permanent molecular bond. Advise customers or gift recipients to avoid scratching or heavily handling the items during this initial window.
- Environmental Resilience: UV DTF prints are waterproof and highly UV-resistant, meaning they will not fade when exposed to warm Christmas tree lights or sunlight streaming through window displays.
- Storage Tips: When packing decorations away after the holiday season, wrap custom UV DTF ornaments individually in tissue paper or bubble wrap. Avoid packing them directly against each other, as high heat in summer attics can cause soft plastics or adjacent varnishes to fuse over long periods of time.
By adding UV DTF transfers to your holiday crafting toolkit, you can produce stunning, high-margin Christmas ornaments that look professional, feel premium, and stand up to years of holiday cheer.
54 ready-made designs, custom prints and sample packs — sent to your inbox.